
Before opting for a VPN, there’s a cost-free way to access crypto trading platforms from Nigeria—changing your internet’s default DNS settings. This simple tweak can make a surprising difference!
In this guide, we’ll walk you through how to switch to a custom DNS, like Google or Cloudflare, on your Android or iOS device. This not only helps you bypass geo-restrictions, but you also enjoy faster speeds and potentially better privacy.
Let’s get started.
A Word of Caution: While changing your DNS settings is generally safe, it’s always a good idea to write down your old DNS addresses in case you need to revert back.
Step-by-Step: How to change your DNS settings on Android
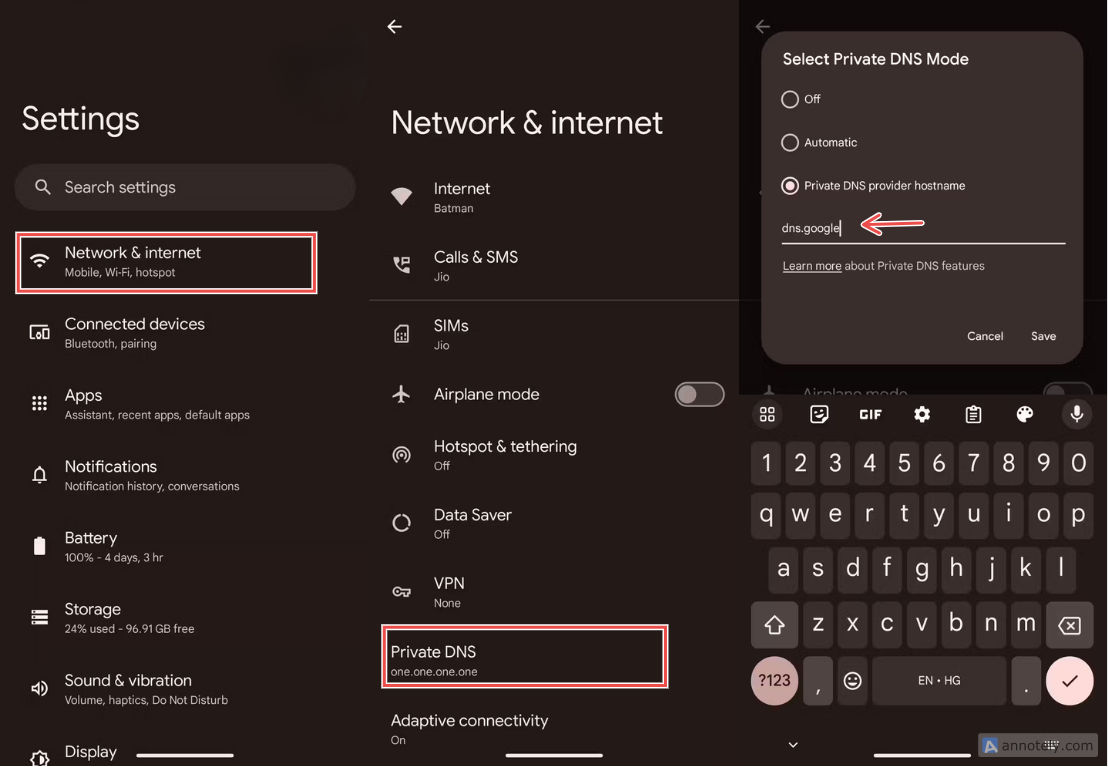
Changing your DNS server on Android has become pretty straightforward since the release of Android 9 Pie. Simply follow the steps below:
Step 1: Access Network Settings
Open your phone’s Settings app and navigate to the “Network & Internet” section.
Step 2: Find Private DNS
You might see the “Private DNS” option directly under “Network & internet.”
If not: Look for an “Advanced” sub-menu within the Network & internet settings. “Private DNS” might be located there.
Step 3: Choose Your DNS Provider
Tap on “Private DNS.” Here, you’ll choose between the default option (usually your ISP’s DNS) and a custom provider.
Step 4: Enter the DNS Hostname (not the IP address!)
Here’s the key difference: Unlike some devices, Android requires a hostname for custom DNS. You can’t just enter the IP address.
For Cloudflare DNS: 1dot1dot1dot1.cloudflare-dns.com
For Google DNS: dns.google
Step 5: Save and Test
Tap “Save” to apply the new DNS settings. You can test your connection by opening a web page and seeing if it feels faster.
Bonus Tip: If you encounter a “Couldn’t connect” error, make sure you entered the hostname correctly.
How to change your DNS settings on iOS
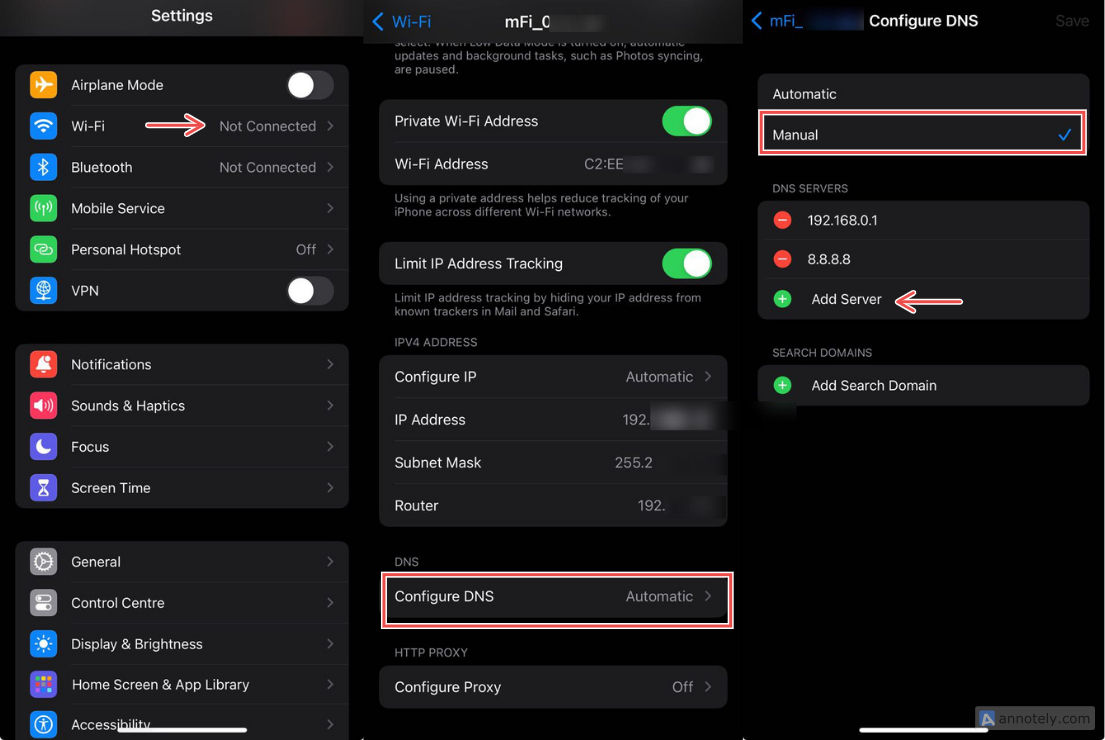
To switch to your preferred DNS server on an iOS device like the iPhone or iPad, follow these steps:
Head to Settings: Open your iPhone’s Settings app.
Find your Wi-Fi network: Tap on the Wi-Fi option, then select the network you’re connected to.
Configure DNS: Look for “Configure DNS” and tap on it.
Switch to Manual: Choose “Manual” instead of “Automatic.”
Add your new DNS servers: Tap the ”+” icon to add the DNS addresses you want to use. For example, to use Google’s DNS, you’d add 8.8.8.8 and 8.8.4.4.
Save your changes.
Keep in mind that iOS doesn’t allow you to use a specified DNS server on cellular connections. You’ll have to use a third-party app like Cloudflare Warp that circumvents this restriction via an always-on VPN connection.
Changing your DNS settings on a Router
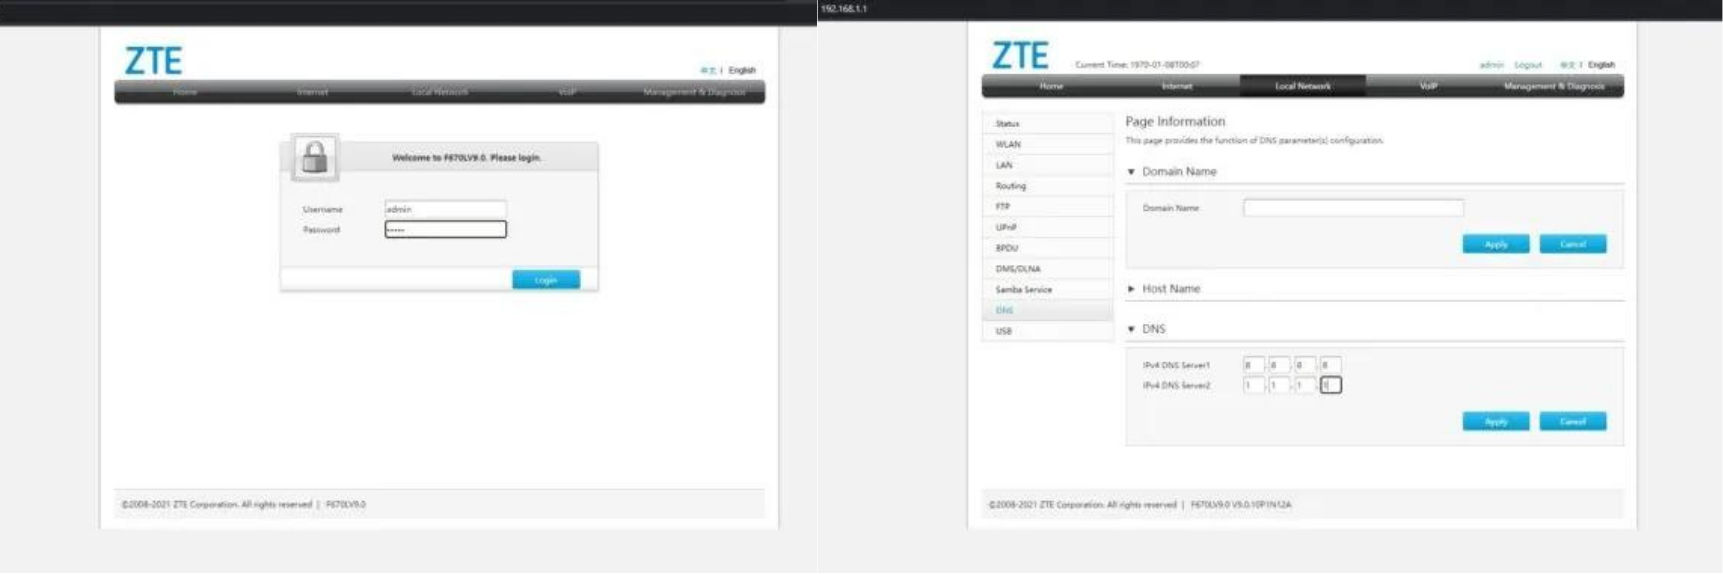
To change your DNS settings, you’ll need to access your router’s configuration page. Usually, you can do this by typing a specific address into your web browser, like 192.168.1.1 or 192.168.0.1.
You might need to first log in with a username and password, which is often “admin” for both.
- Finding the DNS Settings: Once you’re in your router’s settings, look for a section called “Network,” “Internet,” or “LAN.” You might need to dig a bit deeper into the settings to find the DNS configuration options. It’s often labelled something like “DNS settings” or “manual DNS.”
- Updating the DNS Addresses: You’ll typically see fields for a primary and secondary DNS server. This is where you’ll enter the addresses of the custom DNS servers you want to use. Popular choices include Google’s 8.8.8.8 and 8.8.4.4, or Cloudflare’s 1.1.1.1 and 1.0.0.1.
- Saving Your Changes: Don’t forget to save the new DNS settings. You might need to restart your router for the changes to take effect.
On Windows 10, 11 and Mac
Here’s how you can tweak your DNS settings on your PC and Mac:
For Windows:
Head to Settings: Open the Start menu and click on the gear icon to access Windows Settings.
Find your network: Go to “Network & Internet” and then select either “Ethernet” or “Wi-Fi” depending on your connection.
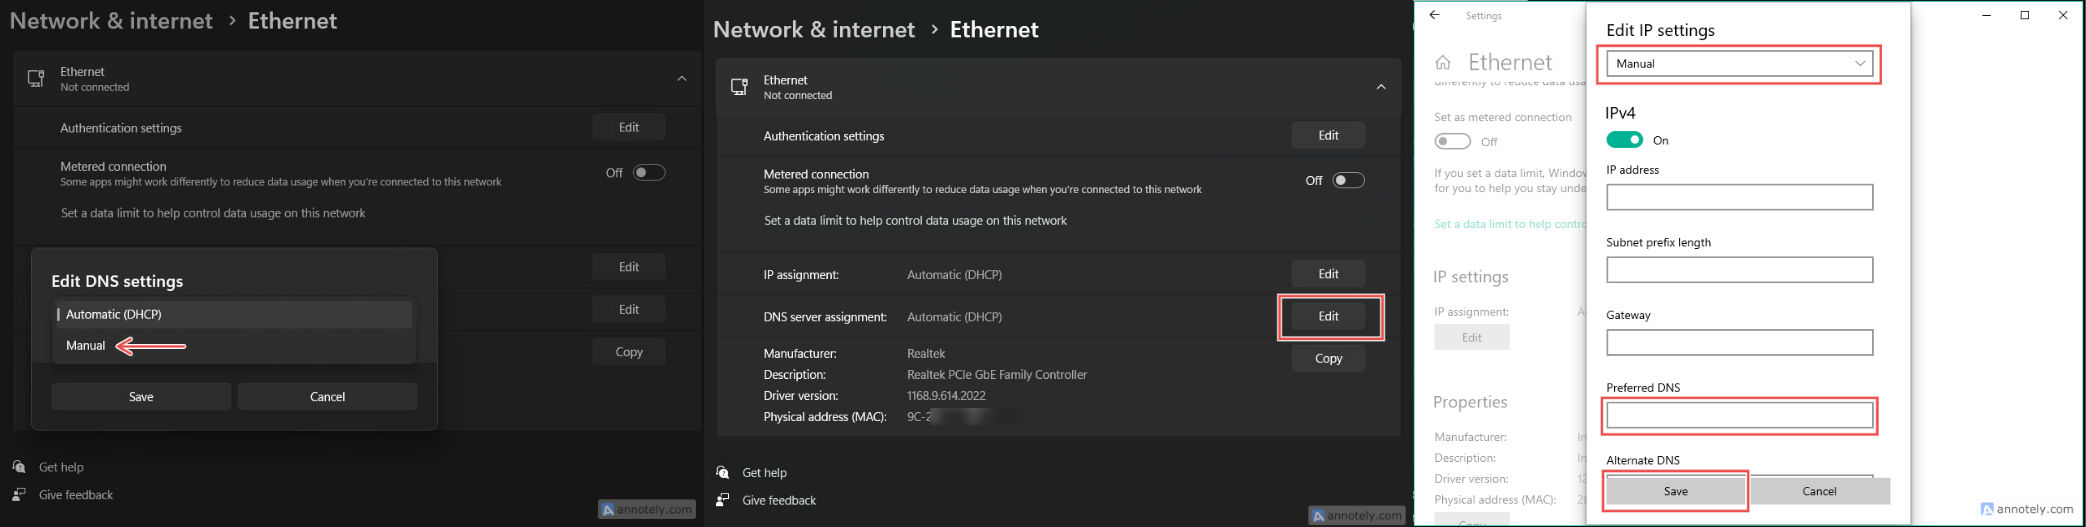
Edit DNS settings: Look for an option to change your DNS server. It might be labelled “DNS server assignment” or something similar.
Switch to manual: Instead of letting your ISP choose, select the option to manually enter DNS addresses.
Enter your preferred DNS: Type in the DNS addresses you want to use (like Google’s 8.8.8.8 and 8.8.4.4) and save your changes.
For Mac:
Access System Preferences: Click on the Apple menu in the top left corner and select “System Preferences.”
Choose network: Click on “Network” to see your available connections.
Edit DNS settings: Select your active network (Wi-Fi or Ethernet) and click the “Advanced” button.
Switch to manual: Go to the “DNS” tab and click the ”+” button to add new DNS servers.
Enter your preferred DNS addresses: Type in the DNS addresses you want to use and save your changes.
Remember: If you have multiple devices connected to the same Wi-Fi network, changing the DNS settings on your router will affect all those devices. Check your router’s manual for specific instructions.
How to confirm your phone is using Cloudflare or Google DNS
To check if your phone is using Cloudflare DNS, visit the 1.1.1.1 help website. It will display connection details, including whether you’re connected to 1.1.1.1 and using DNS over TLS (DoT).
If both fields say “Yes,” your phone is using Cloudflare DNS.
For Google DNS, there’s no specific site, but you can still use the 1.1.1.1 help website. If the AS Name shows “Google,” then your phone is using Google DNS.
Why use Google or Cloudflare DNS on your phone?
DNS servers quietly manage your browsing in the background, but choosing the right one can enhance your online experience. Google and Cloudflare offer free, public DNS servers that often outperform your ISP’s in speed, leading to quicker page loads.
Security is another key benefit. Both services use DNS-over-HTTPS to encrypt your requests, keeping your activity private. Plus, their no-logs policy means your browsing history stays secure.
With robust infrastructure, they ensure reliability and minimal downtime. Cloudflare even offers a family-friendly option to block harmful content, making it ideal for homes with children.
Keep in mind that changing your DNS may not always speed up your connection. The effect can vary based on your location and your current internet service provider.